RDR2 Texture ToolKit (1.1.0 and Above)
How it works:
UPDATE: The tool is now back! I had to remove the converter software from the toolkit as it turned out that I was not allowed to redistribute the software without permission. In 1.1.0 you will need RedM before you can use this toolkit. More specific directions are shown in the program.
This is basically Neodymium’s GTA5 Texture toolkit but only with the components to create a texture file (.ytd). This means that you can’t export the files from “ytd” files but you can do that with OpenIV. You can’t also load “ytd” files. This program also uses the RedM “ytd” file converter from the RedM client to convert the files to the “ytd” format that RDR2 recognizes. This is NOT included with the program. There are existing ways to make RDR2 Ytd files but this tool makes it more easy and not as tedious.
How to Use:
-After opening the program, click File>New.
-Now you can import files by clicking Edit>Import. NOTE: The program only accepts DDS files explicitly. This means if the file ends in .dds but wont open in the program, the file is not in DDS format even if it ends in .dds. If you need to delete a unwanted image, select the image you want to delete then click Edit>Delete.
-When you are ready to create a new “ytd” file, click File>Save. Select the folder to put the “ytd” file in.
-Two “ytd” files will be created. The”ytd” file that has “_nya” in it, is the file that can be used in RDR2. You can delete the other file.
-The “ytd” file that has “_nya” in it, can now be renamed to whatever you want and can now be used in Lenny’s Mod Loader.
How to install:
Before installing, please read the Requirements section to see what you will need before installation.
NOTE: If the files are not downloadable e.g. false positive on virus scan, then download from GitHub mirror under the mirrors section.
Portable install:
NOTE: Only downloadable on GitHub because virus scans always get a false positive on this tool. Go to mirrors and click on GitHub to go to the download page on GitHub.
This is for short term use only.
1. Download RDR2 Texture Toolkit Portable then extract the files to a folder.
2. Run the exe file.
3. Follow setup instructions.
4. Done!
Package install:
This is for long term use and will actually install the program.
NOTE: This will not work if you are on a version of Windows 10 earlier than version 2004.
1. Download RDR2 Texture Toolkit then extract the files to a folder.
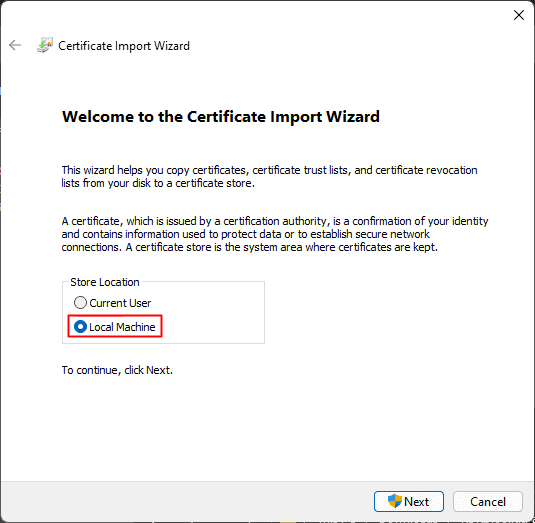
2. Click on the .cer file. Then follow the instructions on screen. This is to allow you to install the program.
3. Click on the .msixbundle file.
4. Click install. If it does not allow you to install, repeat step 2, but select Local Machine in the prompt. If all fails, use the portable version.
5. Run the program.
6. Follow setup instructions.
7. Done!
How to update the tool:
These instructions will tell you how to update the tool.
1. Download the latest version of RDR2 Texture Toolkit then extract the files to a folder.
2. Click on the .msixbundle file.
3. Click update. If it does not allow you to update, click on the .cer file. Then follow the instructions on screen. This is due to the .cer file being expired.
4. Done!

